What I wanted
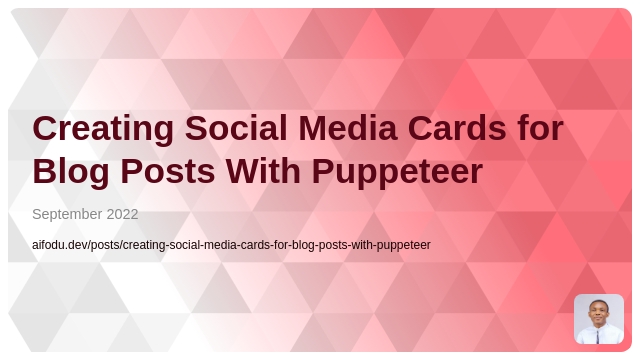
I had seen these nice images that show up when articles are shared on social media. The cards are aesthetically pleasing and informative like the one below.

I, too, wanted the same for my blog posts and wondered how it can be done without needing to run to figma for each blog post.
As expected, I searched the web and here is a distillation of the process that works for me. The card shown above was created with this process.
The process
In my package.json, I created a prebuild script that runs before publishing.
{
  "scripts": {
    "prebuild": "node prebuild.js",
  }
}
Post data
First of all, there is need to read front matter from all the posts in the content folder.
Using: fs, path, front-matter
const fs = require("fs").promises;
const path = require("path");
const fm = require("front-matter");

async function loadPostsWithFrontMatter(directoryPath) {
  const postSlugs = await fs.readdir(directoryPath);

  const posts = await Promise.all(
    postSlugs.map(async (fileName) => {
      if (!!!path.extname(fileName)) {
        const PATH = path.normalize(`${directoryPath}/${fileName}/index.md`);
      } else {
        const PATH = path.normalize(`${directoryPath}/${fileName}`);
      }

      const fileContent = await fs.readFile(PATH, { encoding: "utf8" });

      const { attributes, body } = fm(fileContent);

      return {
        slug: fileName.split(".")[0],
        ...attributes,
        content: body
      };
    })
  );

  return posts;
}
Card template
I created a simple html page on which I tweaked the design of the cards until I got what I was satisfied with. Then I grabbed the HTML content of the card section for use in the composeHTML function as shown below.
The image is saved as a Base64 string and exported from chores/image.js.
module.exports = "data:image/jpeg;base64,/9j/4AAQSkZJRgABAQEAYABgAAD/..."
const baseurl = "aifodu.dev/posts";

function composeHTML(slug, title, date) {
  return `
      <section
      style="
        color: #333;
        background-color: #fcf1f1;
        font-family: 'Segoe UI', sans-serif;
        padding: 1em;
        display: flex;
        gap: 1em;
        line-height: 1.2;
        align-items: center;
        height: 80vh;
      "
    >
      <img
        style="
          border-radius: 50%;
          border: rgb(236, 239, 250) solid 5px;
          height: 150px;
          box-shadow: 0 3px 6px rgba(0, 0, 0, 0.16),
            0 3px 6px rgba(0, 0, 0, 0.23);
        "
        src="${require("./chores/image")}"
      />
      <aside>
        <h1 style="font-size: 1.67em; margin: 0 0 0.4em">
          ${title}
        </h1>
        <time style="color: #838181;
                display: inline-block;
                margin-bottom: 7px;
                font-size: 0.9em;">
        ${datefns.format(date, "dd-MM-yyyy")}
        </time><br/>
        <small style="font-size: 12px; color: #1439dc">${baseurl}/${slug}</small>
      </aside>
    </section>
  `;
}
Why inline CSS? For simplicity, since this chore would run in development environment.
Creating the cards
This is where puppeteer comes in. For each of the posts that are active, I create a card and save it in the static/cards folder.
Using: puppeteer
async function createSharingCards() {
  const postsPath = path.normalize(`${__dirname}/content/posts`);

  try {
    let posts = (await loadPostsWithFrontMatter(postsPath)).filter(
      (post) => post.draft === false
    );

    for (var i = 0; i < posts.length; i++) {
      const { slug, title, date, content } = posts[i];

      const browser = await puppeteer.launch();

      // Create a new page
      const page = await browser.newPage();

      // Set viewport width and height
      await page.setViewport({ width: 500, height: 230 });

      // Create HTML view using the post information
      await page.setContent(composeHTML(slug, title, date));

      let location = path.normalize(`${__dirname}/static/cards/${slug}.png`);

      // Capture screenshot
      await page.screenshot({
        path: location,
      });

      // Close the browser instance
      await browser.close();
    }
  } catch (error) {
    console.error(error);
    throw error;
  }
}
Using the cards
The card images in the cards folder can now be used in the head section of your html page.
{{- $base := .Site.BaseURL -}}

{{ with .imageCard }}
  <meta property="og:image" content="{{- $base -}}cards/{{- .imageCard -}}">
{{ end }}
END.